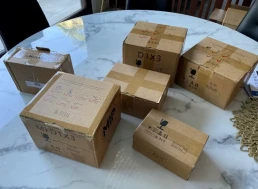
What are they?
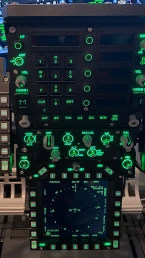
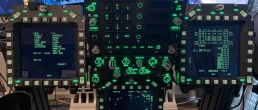
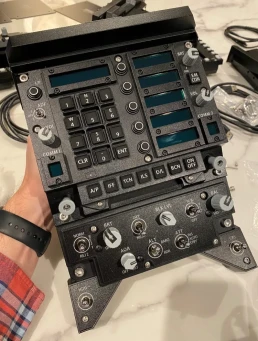
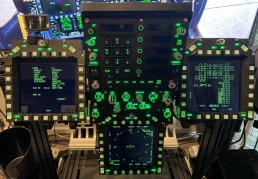
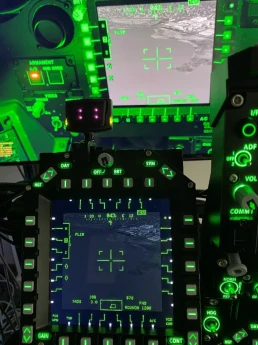
The TOP GUN MIP by WINWING represents another upgrade on their Phoenix MIP product. This advanced model enhances the experience by adding three full-color USB-powered displays to the comprehensive package offered by WINWING. The three displays round out a package that includes the F18 Hornet UFC (Up Front Controller), HUD (Head-Up Display) taking your experience to unprecedented levels of immersion.
About The Author:

Sean is a pilot with over two decades of experience in aviation and senior technology roles within Airlines and Non-Profit sectors. He’s a lifelong flight simmer and avid VR user, blending his passion for flying with cutting-edge technology. From cockpit to virtual skies, Sean loves all things Tech and Aviation.
Key Features:
- UFC (Upfront Controller)
- 1:1 scale and replication
- Adjustable backlighting
- Additional extension buttons on top for greater aircraft compatibility
- Realistic digital display screen
- HUD (Heads Up Display)
- 1:1 scale and replication
- Adjustable backlighting
- Easily integrates with the UFC through a single SATA cable (included)
- MFD (Multi-function Display) – Button Shrouds.
- Made to match the USB Displays
- Adjustable backlighting
- Rotary encoders
- Additional hidden buttons to suit aircraft such as the AH64 that have more buttons around each of the displays
- Additional side slider buttons that can be used for anything or when only a single display is purchased, can be used to switch between the Left, Right and Centre displays.
- USB3.0 Instrument Displays (Screens)
- IPS screen with 1024 x 767 resolution at 60 Hertz
- USB 3.0 powered and connected (Does not use VGA/HDMI/Display Port)
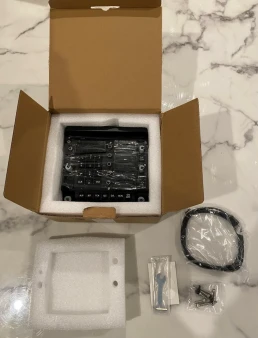
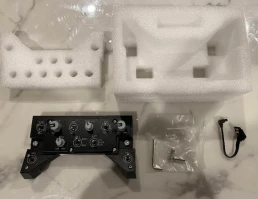
Box Contents:
- UFC (Upfront Controller)
- UFC Device
- Mounting Brackets
- USB Cable
- Double Sided Adhesive Dots
- Accessories and Toolkit packs
- HUD (Heads up Display)
- HUD Device
- SATA Data Cable
- Accessories and Toolkit packs
- MFD (Multi-function Display) – Button Shrouds.
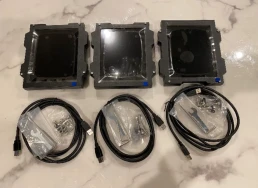
- MFD Devices x 3
- USB 3 Type C to A Cables x 3
- Mounting Brackets x 3 Sets
- Accessories and Toolkit packs
- USB3.0 Instrument Displays (Screens)
- Display Screen x 3
- USB 3 Type C to A Cables x 3
- Accessories and Toolkit packs
- Panel Mounts
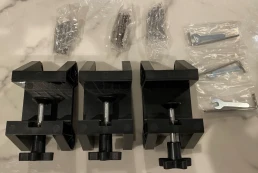
- Panel Mounts x 3
- Accessories and Toolkit packs
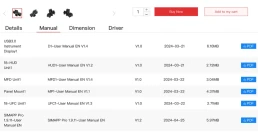
Note – As is the standard with WINWING, no manual is included. These can be found on their Website > Download Center > Download.
Manual:
As these products can be purchased separately, there are quite a few manuals to look at. This is the part where I really wished they’d had a simple single manual that comprises all the steps from start to finish on building the package as a whole. I found while not incredible difficult overall, someone new to the world of having peripherals such as these may find frustration during the setup.
Construction and Materials:
I must tell you; this is one of those products I was particularly excited about and eagerly awaiting the delivery of. Once you start to open items like the UFC and take it out, you can appreciate the quality construction and materials of the device. Yes, most are injection moulded plastic but don’t let that fool you, they feel sturdy and up to the task once put into use in the virtual battlefield.
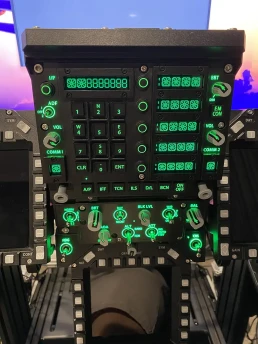
The Upfront Controller has 26 soft push buttons that all have quite a deep, solid press required to activate. WINWING Claim this is an “extended” pushbutton to prevent accidental button pushing. The device also has 5 rotary encoders of which I was glad to see that the two radio knobs for COMM 1 and 2 located at the bottom of the unit both have a pull function mimicking the real airplane.
The HUD is relatively a simple unit compared with the rest of what you’ll receive. It contains 4 dampened rotary encoders that feel great and a selection of large metal 3 position switches that have a solid click when thrown. The two metal switches located at the bottom are for Heading and Course and are both return to centre switches. This unit connects to the UFC through a single included SATA cable.
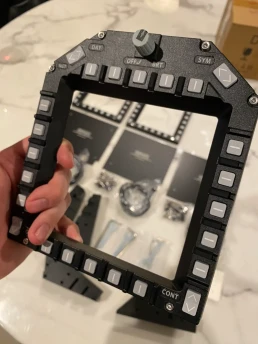
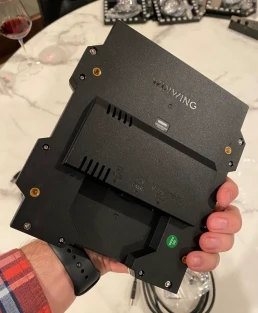
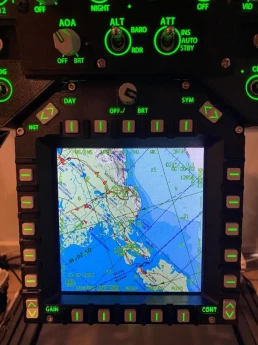
The MFD frames continue the soft feel buttons and include a rotary encoder at the top with pushbutton and that has unlimited rotation. One of the nice advantages of these frames is the inclusion of hidden buttons to cater for aircraft that have more line select keys than that of the hornet. An example of this would be in the AH64 Apache. The extra buttons total 16 and are across all sides of the MFD frames and I think are a great addition to a fairly expensive piece of kit allowing for greater applicability across more aircraft.
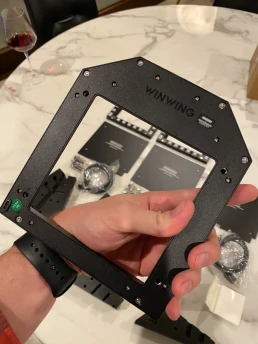
Made from plastic, gripping the frames with two hands and twisting slightly gave very little flex in the construction. I also noticed that they include the blank out plates that come with the Phoenix version of the MIP. Not used in the build, but if later you realise the screens are not for you and the pull towards VR is too great, you could always take the screens out and replace them with the blackout plates.
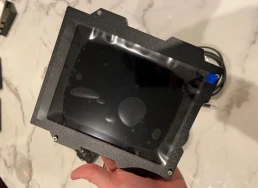
Looking over the screens, they come well packed and include a protective plastic film that needs to be removed prior to mating with the MFD frames. The screens are relatively light in weight but feel strong and well-constructed. The rear of the device is where you connect the power and data cables to the device.
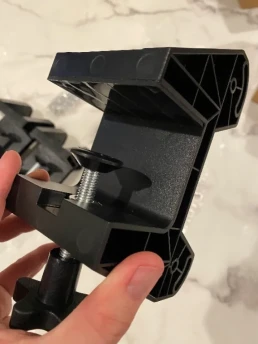
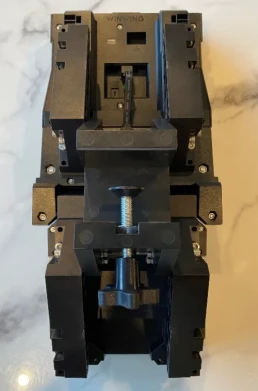
Finally, the mounts are a simple clamp provided by an adjustable screw with plastic end in an injection moulded bracket. There is a rubberised pad to increase surface grip on whatever its secured too, however the lack of length in the screws could be a problem for those with a relatively thin desk or cockpit frame. More on that later….
Setup and Configuration:
Taking a random punt on which manual I wanted to start with first, I began my build journey with the HUD Manual. As it was a relatively simple device, I found myself briefly skipping through to step 6 that has you mate the HUD to the bottom of the UFC with the included brackets and bolts followed by the connection of the SATA data cable. Straight forward and by using the included tools and accessories bags, they were joined, and I was ready for the next task.
Feeling that I was off to a strong start, dived straight into mating the MFD frames to the screens. Opening the MFD manual I found that they only include instructions for mating the blank out plates. It would be the USB3.0 Instrument Display1 Manual that would instruct me on hooking these up to screens.
Installation was straight forward and has you removing bolts on the front face of both the MFD frame and monitor and using 4 longer bolts to bring both parts together. Like other WINWING products, these parts are mated by a bolt that is secured by a nut on the opposing side of the unit. I found that these nuts easily fall out and bounce 49,892 times across the table, floor and dog before you’re able to recover them.
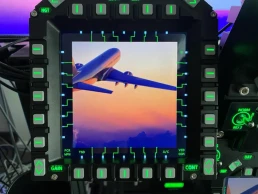
Once MFD was secured to screen, I was impressed at how great these look. The screens themselves are not square so part of the screen is blocked by the top of the MFD Frame, no noticeable impact on use just interesting to note.
So impressed with how I was doing (even after the escaping nut mishap of earlier) My first completed MFD/Screen was added to the UFC and HUD stack. Just like Lego, the more you add to a product like this, the better it looks. The more I built, the more I couldn’t wait to see it in action.
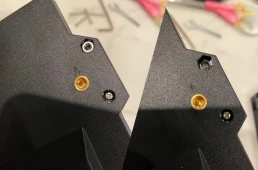
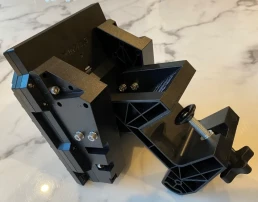
Flipping things around, each screen along with the Upfront Controller attaches to a left and right mounting bracket that’s then secured by 2 bolts.
The bracket serves as either:
|
A. |
B. |
|
A stand for a desk where the unit sits tilted at either 16 or 51 degrees. |
Provided mount points for the desk mounts as used in this build. |
 |
 |
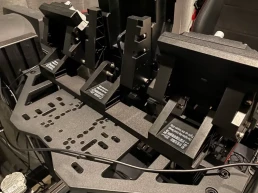
As these would mount to my TR160S Cockpit from Trak Racer, once both brackets were mounted, I then secured them to the clamp mounts using the provided bolts, spring washers and nuts which is straightforward.
After installing the last clamp mount, I was ready to take these over to the cockpit, mount them up, plug them in and hit the skies… or so I thought.
It was at this point that I hit my first oh no moment and roadblock. The desk clamps allow for a total of 50mm in desk thickness to clamp however as the screw assembly does not screw in all the way, you are left with around 13mm of gap between the stop at the end of the screw and the opposing side of the clamp. My wheel/yoke mount on the TR160S is the Trak Racer UNIVERSAL WHEEL PLATE DECK WITH FULL SLIDE AND ANGLE ADJUSTMENT and is only 10mm thick. So, with 3mm of gap I was unable to secure any of the TOP GUN MIP to my cockpit.
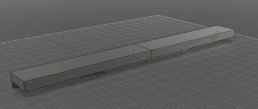
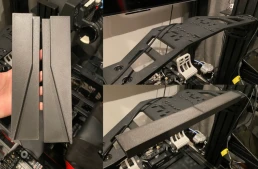
Luckily again for me, my 3D printer shot to the rescue and with a quick whip up of 2 brackets to increase the thickness of my mounting plate, I was back in action.
As the cockpit has motion provided by a Sigma Integrale DK2+ system, I was conscious about ensuring that these devices were secure. Luckily enough the design provided enough for the clamps to tighten both my 3d design and the frame mount from my cockpit and once secure did not move.
Right, surely, it is now time to crack open SimAppPro, configure these and hit the skies… right? Right???
It was not time to go flying at all. Unbeknownst to me, I thought I was 3 USB cables short. The MFD frames come with a USB Cable, the UFC comes with a USB cable, looking at the back of the screens I see a USB C plug stating 5V Power.
It was at this point that I was both rather shocked and a little disappointed that I thought these cables were missing. The only reference on the website that I can find about these states:
”A series of USB TYPE C power socket is reserved, you can apply your cell phone charger to supply your panel when the HUP/PC power is insufficient”
Not a statement I would say sheds much light or direction on what to do prior to receiving the device and discovering this for yourself. Checking the manual I did find reference to the missing cable and instructions that you need to source this yourself. I am really lost trying to understand why 3 simple cables are missing and could be easily included at this price.
What this translates to is that if your PC USB Port or the USB Hub you have cannot power the screen on a single USB cable they provide, you have an additional USB port (the USB-C port) that you can use to also provide power to the screen. As I hadn’t plugged anything in and powered up the device yet, I thought I was short of the 3 cables and subsequently went out and purchased 3 more USB 3 Type C to Type A cables.
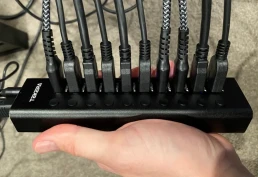
Luckily for me I discovered after plugging everything in that I didn’t need those 3 additional cables at all as my powered USB hub could handle it. I have had several of the TEKERA Aluminum 10 Port USB 3.0 Data Hubs and have not had any issues. So All up you require 7 additional USB ports in total to run this however if you do require those 3 additional USB cables for power or you’re an idiot like I am, you will require 10 free USB ports.
Anyone hoping to achieve a clean look especially on a home cockpit will need to draw on all their skills to tidy up the cabling. While USB hubs are a part of life when you start collecting gaming peripherals, I would like to see some improvement here whereby perhaps there is an inbuilt USB Hub or some technology to reduce the significant number of cables required to power the TOPGUN MIP in its entirety.
All mounted and powered by those missing USB cables, I was ready to dive into SimAppPro and take the next step towards finally seeing this kit in action. As usual once starting SimAppPro I was greeted with a familiar notice of firmware upgrades available and was happy to once again go through that process and ensure all the devices had the latest firmware.
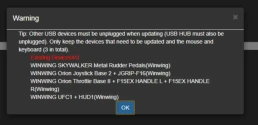
Given the number of USB Cables for this setup and not being quite sure which USB did what, I did roll the dice on the warnings of unplugging other devices prior to firmware updating. Holding my breath and pressing update, I felt a sense of calm wash over me when after several firmware updates later, everything was updated and without issue.
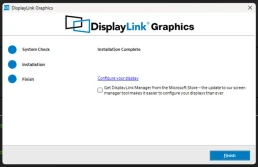
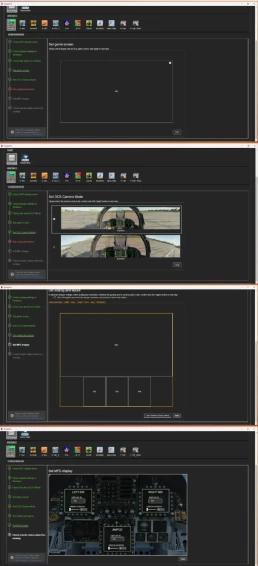
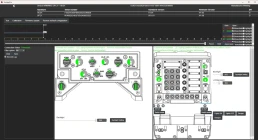
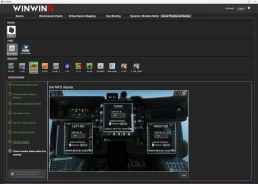
Moving on from firmware updates I headed to the Game Peripheral Display tab to walk through each of the steps in getting the screens running. It was a simple process of simply clicking through each of the steps and performing the action which included the download and installation of a MFD Display Driver which brought the screens to life.
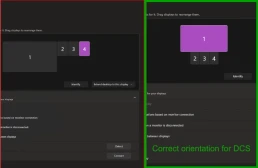
Once the Display drivers are installed, Microsoft Windows will see them all as additional monitors and you will be able to arrange them in a similar way to all other multi-monitor setups within Windows. By default, they will be sitting next to your main monitor, if planning to use these in DCS, arrange them so they are under your main display. I believe this is required due to the way DCS handles additional monitors.
Once the screens were orientated, I continued through the steps to complete the tasks as necessary. While there were several to go through, all of them are relatively easy to understand and hassle free.
Special note on step 4. Should you change any graphics settings in DCS after you complete Step 4, DCS will scale the game window across your WINWING Screens and not keep them for cockpit displays. Closing the sim and returning to Step 4 after making those changes and clicking Apply fixes this.
Interestingly, Step 5, SimAppPro asks to confirm your camera mode. The bottom option to me looks like a mode you’d be in if you had 3 screens. As I only have 1 4K TV it was the top option that I selected on this step.
If you find that SimAppPro hasn’t picked up the change in orientation and layout in Step 6 (like mine), a simple restart of SimAppPro should fix it.
Step 7 has you telling SimAppPro which screen plays which role, left/right DDI and AMPCD. It’s this setting that also gives you the option of applying a green tinge to the screen to better replicate screens in the real aircraft I’d imagine. I found that adding any green wasn’t required.
Closing out the configuration is step 8 which is simply monitoring once DCS is running. I did find keeping this page open whilst in DCS resulted in a screen ID overlay and I would need to get out of this page in SimAppPro for it to disappear.
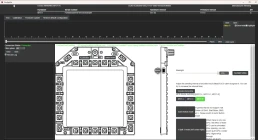
Those with other WINWING products will be familiar with calibration and test screens. Similarly to other products, every device has the option of syncing backlighting to DCS or an Axis. Whilst on the MFD configuration page, an additional step is required.
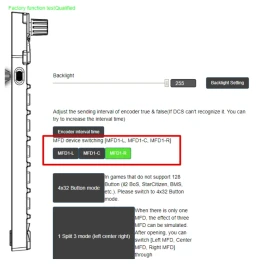
As with the previous steps of assigning the screens to the correct DDI position and AMPCD, we need to tell SimAppPro which MFD frame is on which screen. This is done by pressing a few buttons on the frame to find which one replicated on the chosen MFD Frame you have open in SimAppPro. Once found, simply select the option of Left, Centre or Right. Once selected, the MFD frame will disconnect and reconnect. Close/Open this page in SimAppPro for the changes to show up.
As all the buttons on the UFC, HUD and MFD frames are considered joystick buttons, they need to be assigned. Now you could do this painstakingly in DCS manually, but WINWING has created Key Binding profiles for all these devices and within a few clicks you’re ready to go.
Simply select your Device, the Simulator and Aircraft type to download the WINWING profile for each device.
How do they feel?
Well, compared to the frustration of mounting these and a shortage of cables, I’m happy to say that the MIP has been an absolute joy to fly with. Excusing the occasional muscle memory of looking down at the targeting pod on my gaming monitor and reminding myself that I have a physical screen in front of me, it has really added another level of immersion to my DCS experience.
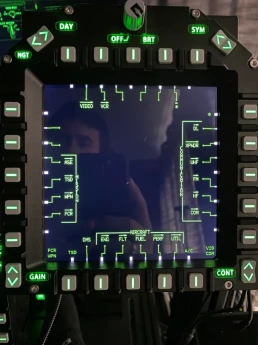
Despite a resolution of only 1024 x 767, the image is very clear and more than capable of showing the level of detail to strike fear into the hearts of our virtual enemies. There is some reflection, the screens are not matt and there is a slight chance of catching a glimpse of yourself looking less than perfect as you’re trying to take out that BMP!
One of the unexpected joys that has come about from obtaining the TOPGUN MIP has been entering waypoint information. I wasn’t a fan when using a mouse or in VR entering them but now that you have a physical button, it’s a lot more fun and immersive experience.
Like other WINWING products, syncing to DCS lighting is an option in SimAppPro and continues to work well across all their products, the TOPGUN MIP no exception. Simply assigning a knob on the Orion 2 to panel lights, I can bring all the lights up together. The UFC has the added BRT (Brightness Knob) which can be used to adjust the brightness of the UFC text displays.
Satisfied with just how seamless the integration with the F18 Hornet was, I decided to go into my favourite helicopter and see how the screens handled the AH64 Apache. As mentioned earlier, the MFD frames include hidden buttons between the gray line select keys, it would be in this aircraft we’d need them.
Luckily WINWING have thought of this and within SimAppPro you can enable an additional feature that gives you some help on lining up which button to push. Enabling the “MFD KEY GUIDE” on each of the displays adds an additional overlay to each screen with some arrows for alignment to easily show you which button to push physically to match that being displayed.
Once in DCS it was clear that these were of great benefit when flying the Apache. Simply following the green line to the associated button greatly reduced miss clicks and meant that I could easily use the panels without fuss.
The added overlay showing which button to push for the action you’re after is a handy feature!
For Air-to-Air combat I had no issues with screen brightness however, I noticed that once I went Air-to-Ground and was looking down into the Targeting pod screen, the physical screen was much darker than that of the targeting pod in game. While it was noticeable in the F18 Hornet and I could counter it to some degree by increasing the brightness to max in the hornet, it was much more intrusive in the AH64 Apache. In the chopper I was almost unable to see ground targets given how dark the TADS was. This surprised me as the screens are more than bright enough when I’m out of the game and just looking at my desktop through them.
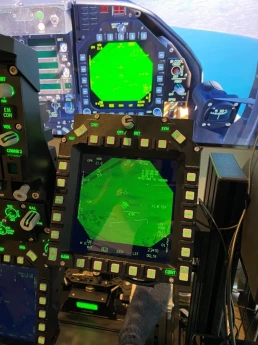
Below images show the WINWING screens vs computer monitor:
Further investigation revealed that a bug currently exists in DCS that makes additional monitors (such as the 3 that come with the TOPGUN MIP) darker than the main game display. While it appears the developers of DCS are aware of this, no ETA has been discussed or communicated that I could find. Now this isn’t a deal breaker if you’re flying the hornet, you can overexpose the in-sim DDI as shown in the picture and simply look through your WINWING DDI (if the overexposure in-sim doesn’t bother you) however if you plan to use this with other aircraft such as the AH64 it can be a challenge in some situations to clearly see all targets.
As Apache flying makes up almost 50% of my DCS time, I was keen to find a solution. Luckily enough for us, we have some smart and engaging people in the Flight and Flight Combat community and through tools such as ReShade, we can solve the problem and make DCS look better in the process. Given I know a lot of people reading this will be mindful of spending so much money on something rather type specific to the Hornet. I have a link HERE to a quick guide I’ve done on how to lighten up the screens to better match DCS and improve the overall look of DCS as well.
Conclusion:
A brilliant bit of hardware let down at the start by perhaps some minor design shortcomings with desk clamps and perhaps some minor confusion (which could just be me) on USB cables. Once you’re past that though the experience is one of the most immersive improvements you can make to your flying experience. Working in the cockpit of a hornet has never been more fun. The displays are clear and easy to see most of the time, the buttons, encoders and switches all do what they’re designed for and once clamped down securely the unit doesn’t move.
I’m a huge fan of the additional hidden buttons and the corresponding overlays that make the TOPGUN MIP far more cross compatible with various aircraft. Despite some early issues, this is a solid performer and if you can spare the cash, a worthwhile investment.
8/10
Pros
- Brilliant once setup and configured, never had any issues with it
- Solid feeling across the buttons, switches and encoders
- The added hidden buttons on the MFD frames and overlay making it easy to fly aircraft that require more buttons such as the Apache
- Screen resolution and display very clear
- Looks amazing on a home cockpit
Cons
- The desk/table mount clamps don’t clamp beyond 37mm leaving 13mm of gap in the clamp, if you have a thin desk/table/cockpit you will need something thicker to secure these too.
- Better clarity on USB cables and powering of the screens would be nice, perhaps contained in one easy to understand manual covering everything you get for the TOPGUN MIP.
- Cables galore, can there not be some inbuilt hub or feature available to help clean up the 7/10 USB cables that drive the TOPGUN MIP?
Check out more Reviews by Boosted Media
November 1, 2024
Sim Racing Black Friday Deals
June 24, 2024
WINWING 15EX II Metal Throttle Grip Review
June 14, 2024
Trak Racer TR160S – Review
February 17, 2024

