What is it?

The Orion 2 joystick base is the next iteration of the Orion base bringing about a high quality and customizable joystick base for flight simulation.

Key Features

Quick-Swap design for easier adjustment
34 degrees of movement in X and Y axis
16-Bit Hall Sensors
Compatible with both extension rod and Z-Axis rotation modules
Compatible with the F16 Force Sensing Module
Compatible with many of the other WINWING Joystick grips

Purchasing the additional CAM/Spring/Damping Extension Kit adds:

50+ Combinations for force adjustment
No centering mode for helicopter flight

About The Author:

Reviewer: Sean

Sean is a pilot with over two decades of experience in aviation and senior technology roles within Airlines and Non-Profit sectors. He’s a lifelong flight simmer and avid VR user, blending his passion for flying with cutting-edge technology. From cockpit to virtual skies, Sean loves all things Tech and Aviation.

Unboxing

Like all previously received WINWING products, the Orion 2 arrived undamaged and well protected by its foam packaging. The individual items are further protected by plastic wrapping and all parts arrived undamaged from their Australian distributor.

Winwing Orion Joystick Base Review Unboxing

Box Contents:

Orion 2 Joystick Base
Table mounting plate
4 x Suction cups with tools

USB Type B to A cable measuring 2m in length

Note – As is the standard with WINWING, no manual is included. These can be found on their Website > Download Center > Download.

Manual

The manual is simple but functional and provides basic instructions on both installation of the table mounting plate and securing your purchased flight stick.

Winwing Orion Joystick Base Review Manual

Interestingly it also includes an overview of the different springs and cams available that are not included in with the base product and must be purchased separately, more on that later

Winwing Orion Joystick Base Review manual
Very clear, but where are they?

Construction and Materials

The base external construction is made of aluminium alloy for both the external shroud and mounting plate while the internal construction is stainless steel.

The mechanism is protected by a fairly thick rubber boot that protects the internals from dust and other debris that could enter and damage the internal movement of the stick. The mounting mechanism is a solid free rotating threaded metal ring that has a locking nut that is inserted to clamp down and prevent accidental rotation of the attached joystick which could damage the data connector within the stick.

On the underside of the base of the aluminum frame lives 4 holes to allow the base to be mounted to additional mounts through the use of M4 bolts.

Winwing Orion Joystick Base Review Construction

Access to the internals is straight forward and achieved by removing the 4 x M5 bolts on each corner of the top face. The top then simply pulls upwards away from the external shroud of the base revealing the internals.

The base itself measures in at 114mm wide, 124mm long and from base to the top of the metal securing ring sits 114mm tall.

From factory you receive it configured with medium strength springs and a non-detent CAM that provides no mechanical bump/notch for centre position.

Winwing Orion Joystick Base Review Construction

Setup and Configuration

The Orion 2 would be mounted to a monstertech mounting plate that would sit between my legs on the TR160S. As my seat does not have a centre cut out (much to my dismay) I had to add some additional height to allow for the head of the 4 x M4 bolts to not grab on the seat as I pulled it in or out.

Winwing Orion Joystick Base Review Setup
Tight but it fits!

In classic WINWING form, once connected to the computer and SimAppPro started you are greeted with the familiar firmware update which completed without hassle.

Winwing Orion Joystick Base Review Setup

Once the firmware update was completed, I selected the stick/base from the main menu and noticed that while the physical stick was centred, it was not in SimAppPro. It looks like a calibration would be required to ensure the stick was centred within the application. Calibration was simple and completed through the application by moving the stick to the maximum throw in both X and Y positions followed by retuning to centre.

Winwing Orion Joystick Base Review Setup
One calibration please!

By default it looks like the application displays the Z-Axis twist add-on by default regardless of if its installed or not. As I didn’t have it installed, I simply ignored it. Please note that the base does not have a Z-Axis rotation without the add-on purchased separately.

The application also has a software driven dead-zone configuration to set a zero response from the stick until you reach a certain degree in motion. Not something I was to use as I chose to complete this in the simulator.

Winwing Orion Joystick Base Review Setup

How do they feel and fly?

I preface this commentary by stating that I have not reviewed other WINWING joysticks other than the 16EX Metal Joystick with Shaker Kit (used on this base) at the time of this review. So I cannot speak to the weight of some of the other WINWING Sticks. However, as the simulator cockpit is a TR160S mounted on 4 powerful actuators provided by the Sigma Integrale DK2+ motion system, the first thing I noticed was the amount of oscillation in both X and Y axis with any moderate movement on the cockpit. This was also easily replicated by simply pulling the stick to one side and releasing allowing the stick to return to centre.

Winwing Orion Joystick Base Review Flight Experience
Serious business, but where’s the cable management!?

As there are no additional springs or damping provided with the base, you’re left with the default configuration which I believe are far too soft for a stick of this weight. Reducing the oscillation effect can be resolved with some heavier springs and added damping, all of which are not included and must be purchased separately for an additional $85 Australian dollars ($57 USD), or almost 25% of the price of the base itself.

Given this experience I felt I couldn’t fairly review the base without the additional CAM/Spring/Damping Extension Kit. After a quick conversation with WINWING I had the extension kit and was ready for blastoff.

Winwing Orion Joystick Base Review Flight Experience
85 dollars worth

Looking at the base in its stock configuration of medium springs, NC-ARC Cams and with no damping, Initially the stick just felt so light in my hands with very little force required to move it. This lack of force from the springs meant it was quite easy to reach full stick deflection with confirmation of max deflection coming from a metallic metal on metal thud within the base. While it doesn’t sound like you would damage anything I did feel like it would have been nice to have some sort of slightly softer rubber stopper or similar rather than the metallic whack.

The lack of pressure needed for movement meant it was very sloppy in that first 5 or so degrees in each axis which for me results in difficulty with precise movement needed for tasks such as Air-to-air refueling and landing back on the carrier. For me personally, I just felt that with this stick combo with default cam/springs and no damping didn’t have the resistance I would have liked or become used to in other sticks such as the Thrustmaster Warthog.

Receiving the extension kit completely revitalises the base and allows you to configure exactly to your liking. Having tried many different configurations, I settled on heavy springs and the NC-1S Cam with added damping on both X and Y axis that allowed for a firm solid pull and a return to centre without oscillation.

For Helicopter flying I settled on removal of both Springs/Cams and simply applied more damping to hold the stick in position. Given the base has a thick rubber boot protecting the top, I found that the stick couldn’t hold itself on the outer 5-10% of the travel range as the pressure from the compression of the boot would simply move the stick back a little. This could be solved by applying a massive amount of tightness to the damping. However, at the point you lost any ability for minor movement given how much force was required to move the stick in any position. Not an issue as you would hardly ever been at this maximum position during a normal flight.

Winwing Orion Joystick Base Review Flight Experience
Before (Stock)
Winwing Orion Joystick Base Review Flight Experience
After (Extension Kit Damping)

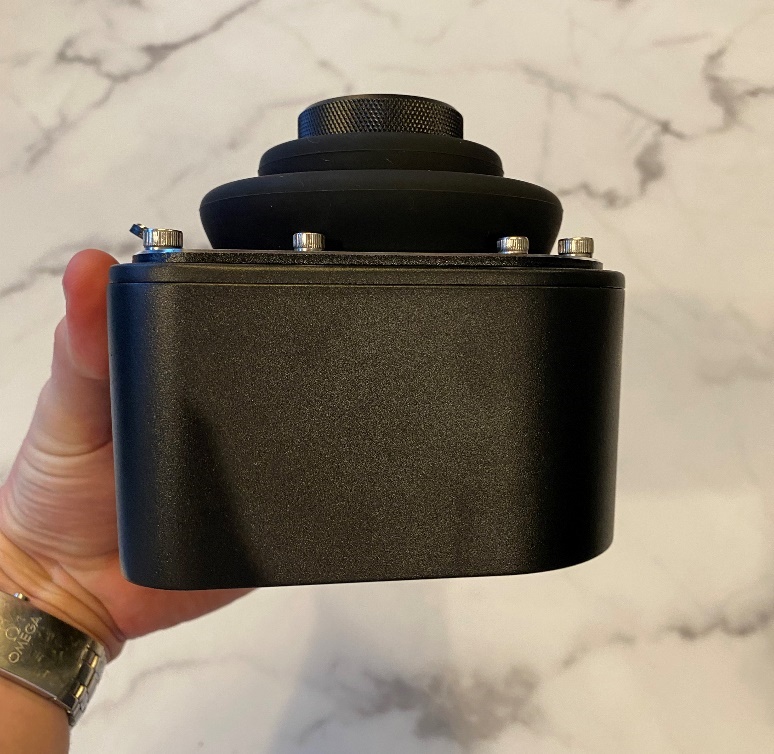
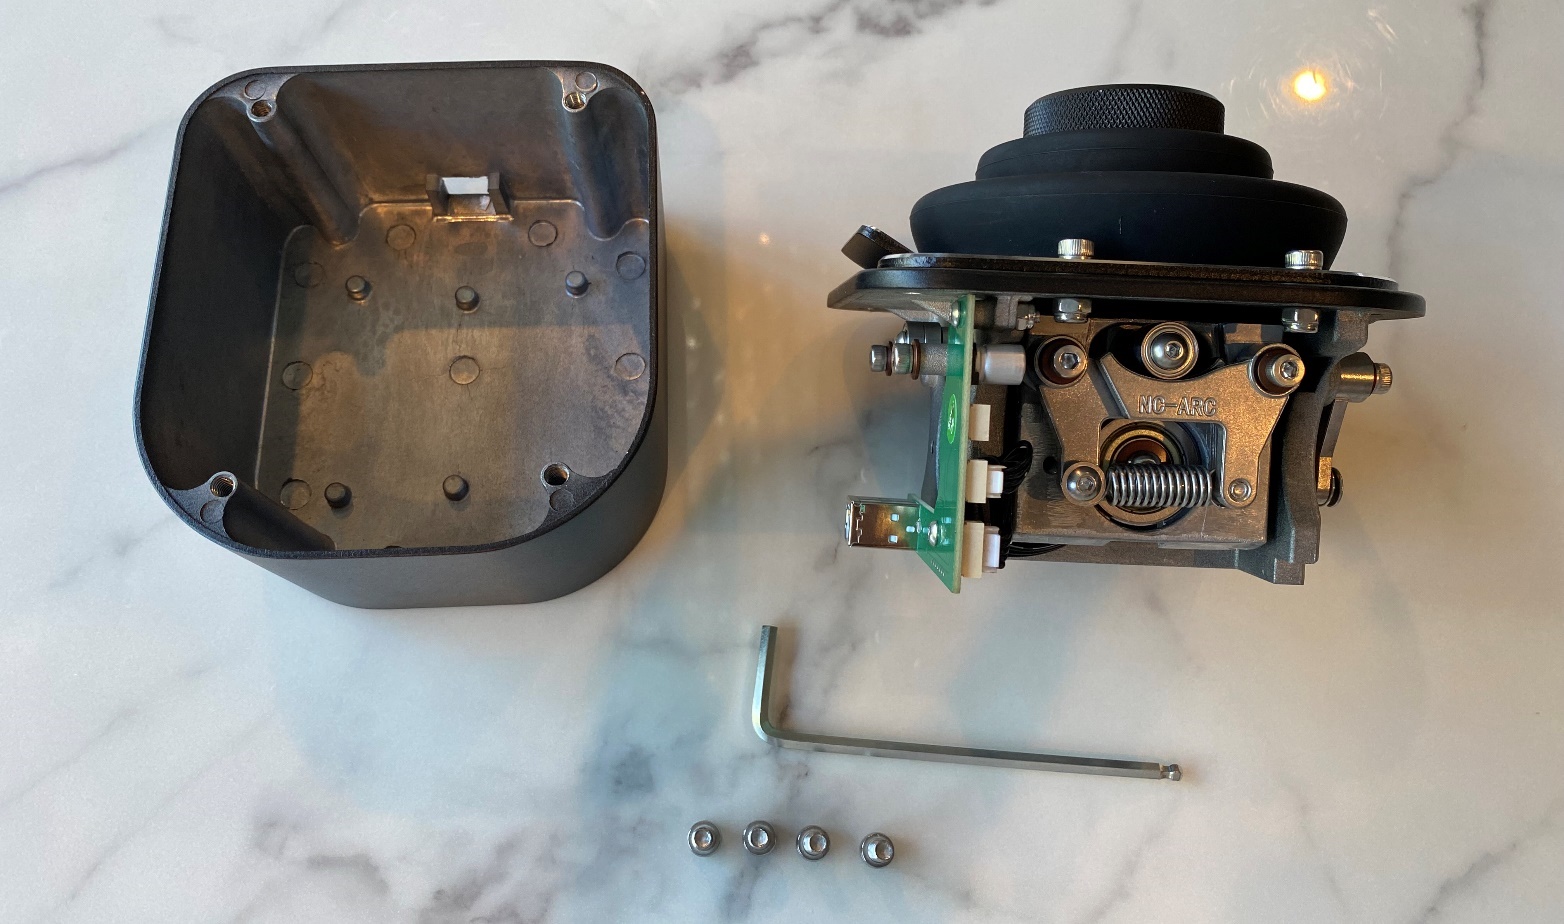
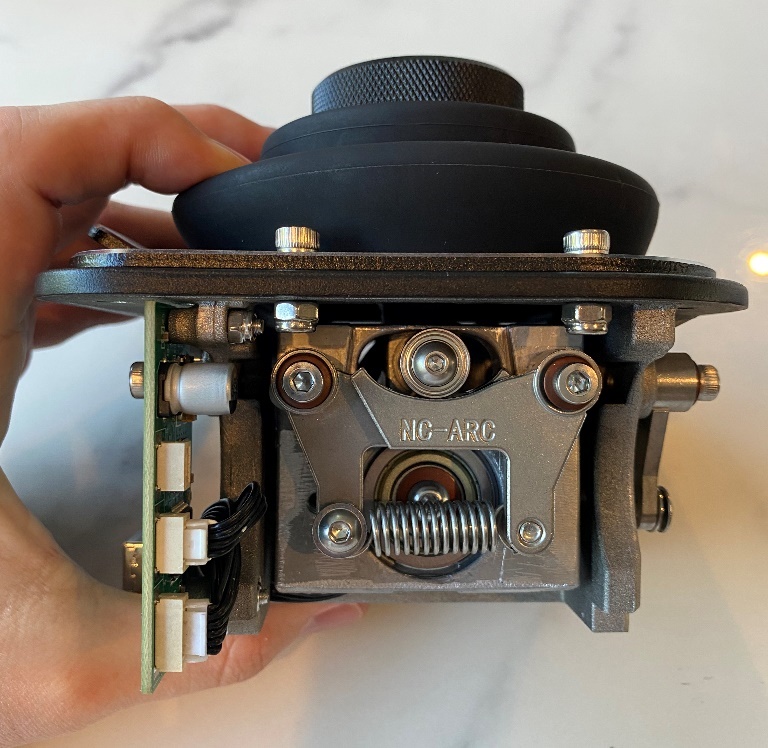
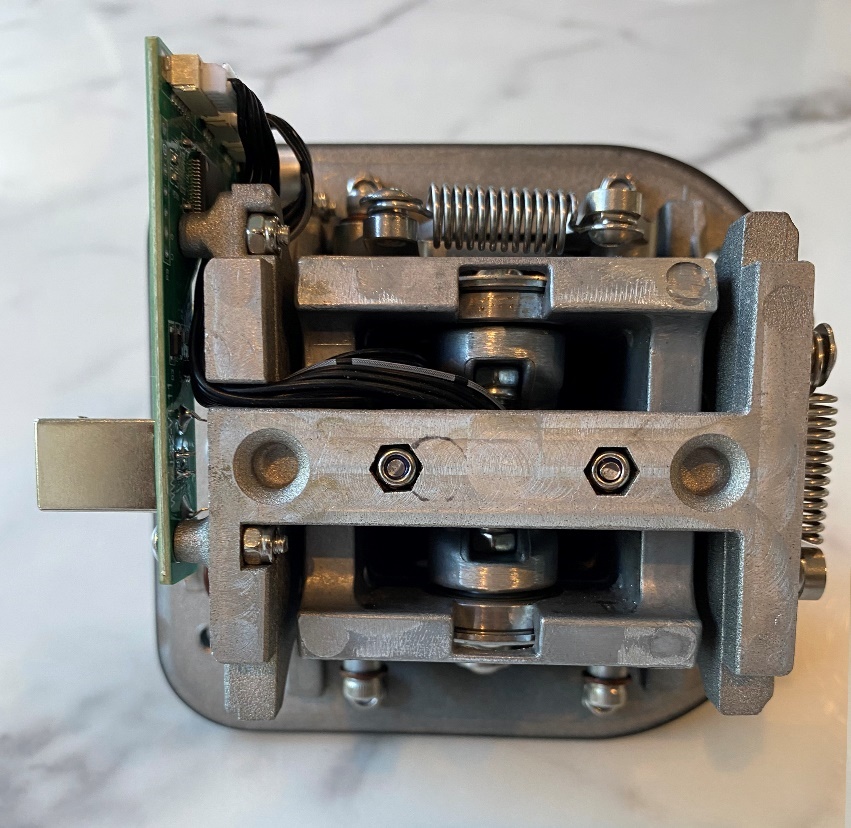
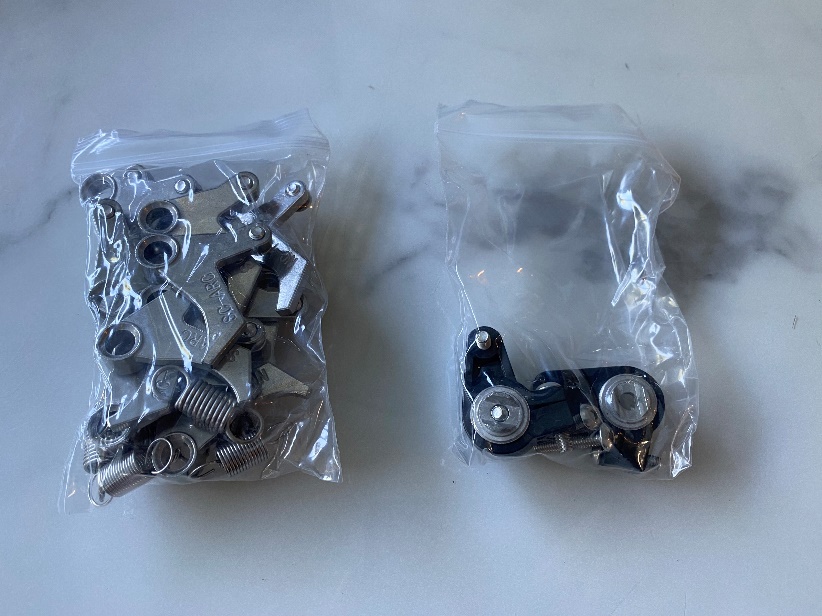
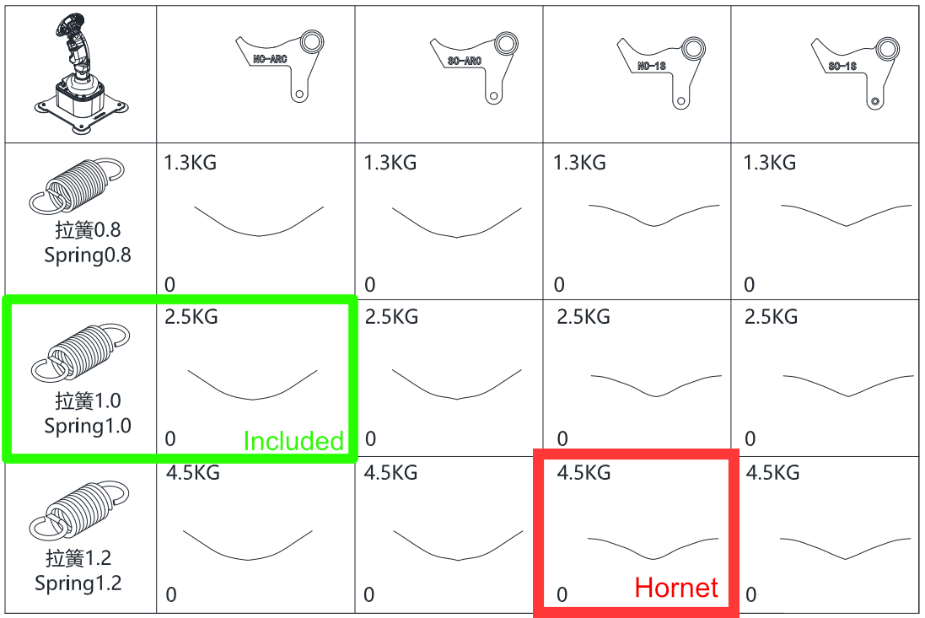
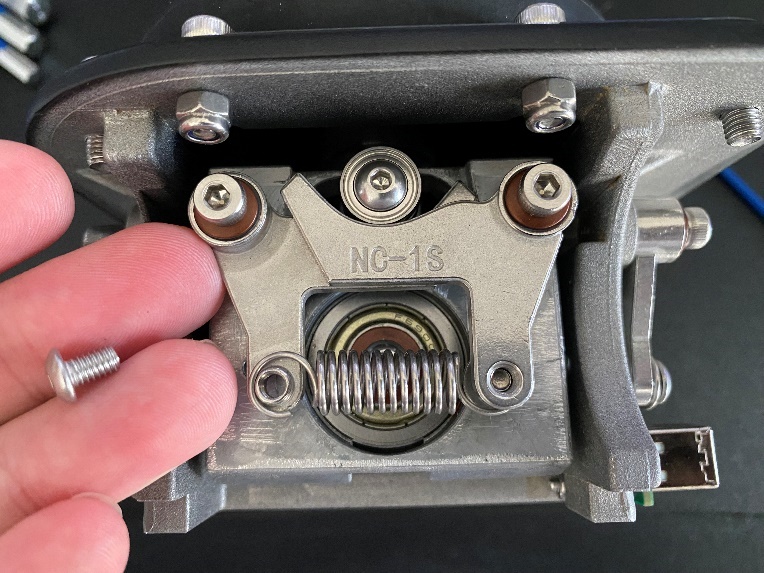
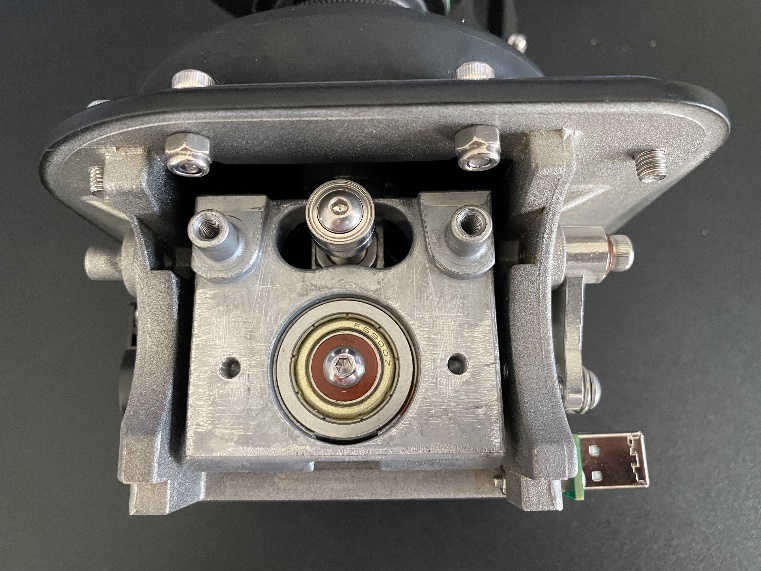
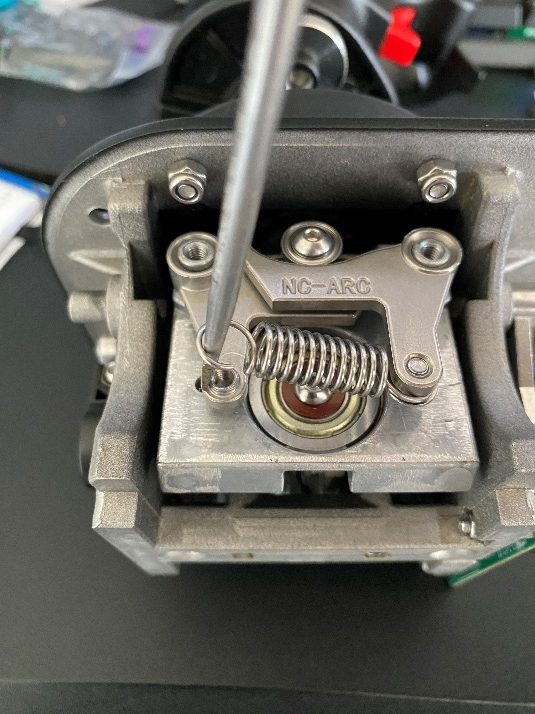
Adjustment of the internals is straight forward and simply done with the use of metric hex key set and flathead screwdriver. Once under the hood the springs are removed from the cams by the removal of the security screw to reveal the spring resting on the wall of the screw hole. Simply pull the spring off the wall to release it.

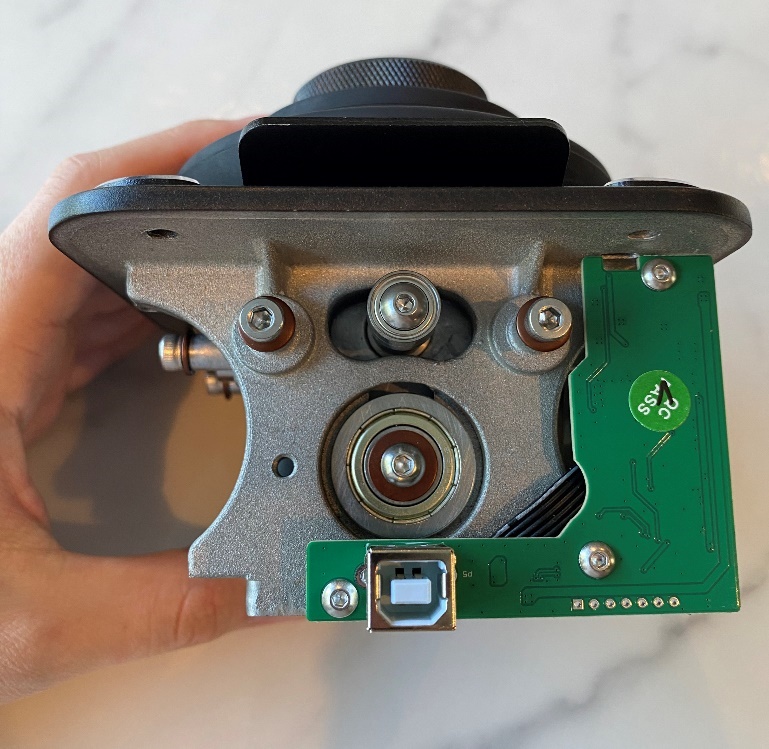
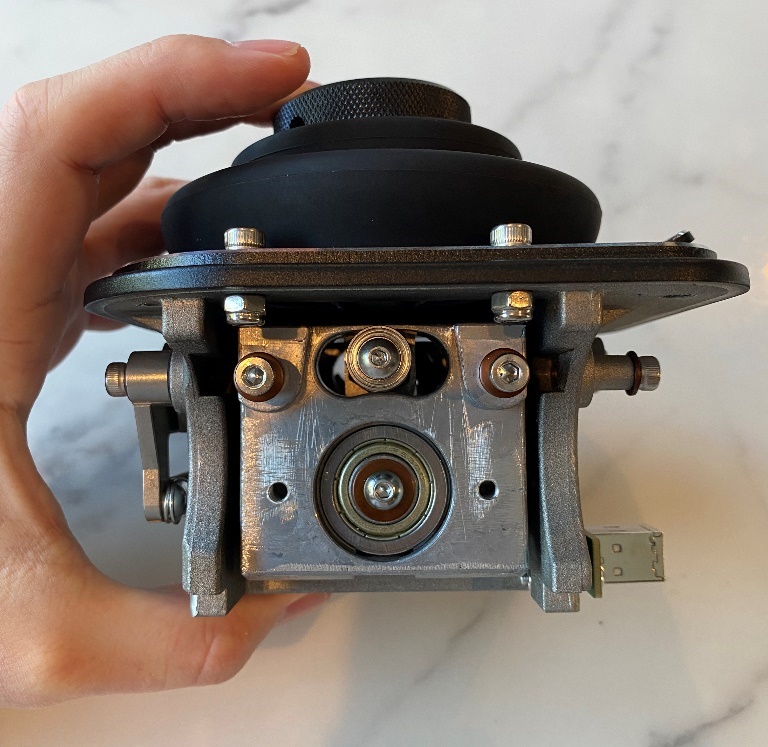
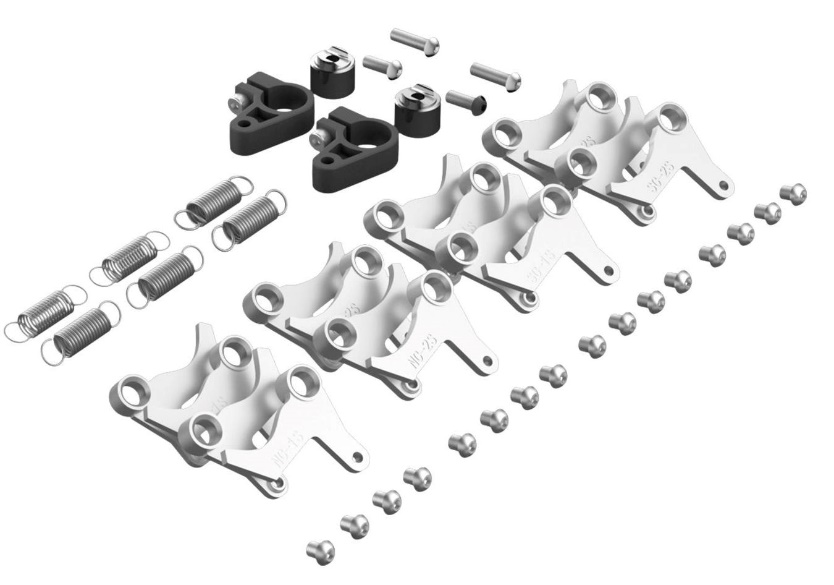
Cam removal is as simple as the removal of the two bolts and copper washers on each side of the respective cams. They simply pull off revealing the centre damping screw located in the centre of each axis. As there are two sides to each axis, you’re able to purchase a second extension kit to further add to the force on each axis to aid people that may use this base with an extension rod setup. Note that adding Cams/Springs to both sides of an axis removes the ability to add damping.

Winwing Orion Joystick Base Review Flight Experience

Spring installation is simpler with a flathead screwdriver levering off the side of the screw thread

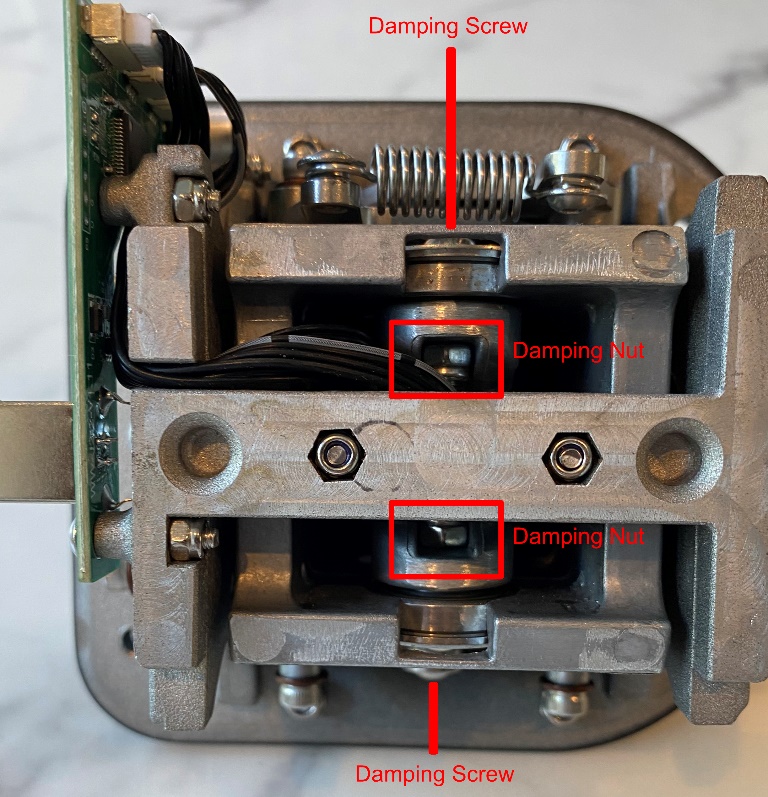
Adding damping is a simple affair, however caution needs to be taken to not loose the nut located in the centre of the base. Assuming you’re not adding cams on both sides of each axis, you remove the centre bolt and add the damping barrel that’s secured back with the same bolt that was removed. The challenge here is that as you remove the bolt there is a nut that can fall free and is a pain to get back in place if it does fall out.

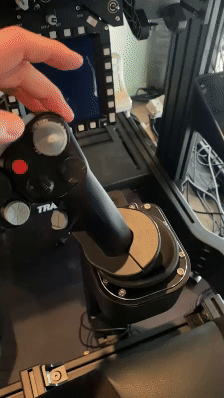
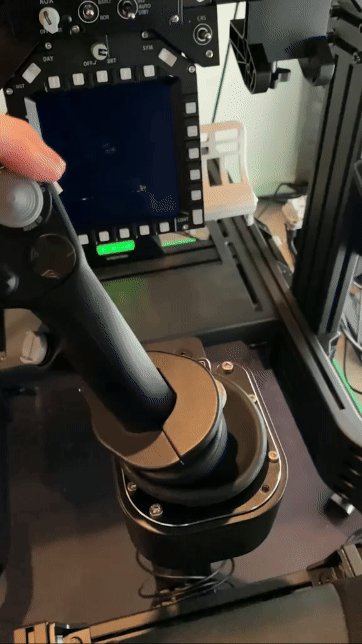
Removing the stick and sitting the base on the metal securing ring will assist in the nut not falling out from its place within the mechanism.

Winwing Orion Joystick Base Review Flight Experience
Left: Top down view of base upside down
Winwing Orion Joystick Base Review Flight Experience
Right: Damping barrel and plastic jacket

The amount of damping force is applied through tightening the bolt on the black plastic jacket that slips over the metal barrel and is secured through a single bolt. I found only minor tightening resulted in very noticeable damping effects of the sticks movement. This sort of adjustment is always a balancing act between damping the sticks movement just enough and not start to lose the ability to add in minor control adjustments. I found that I spent extensive time trying to find that sweet spot to only realise I hadn’t got it quite right when I found myself in situations such as finessing the controls during Air-to-air refueling. If you’re a bit of a perfectionist like me, expect a few hours doing this. If you’re also like me and find yourself in helicopters, you’ll do the whole thing all over again as you find the sweet spot where the damping holds the stick in the same position but doesn’t result in you unable to make minor adjustments given the force you may need to apply.

One minor annoyance I did find switching regularly between jet and helicopter flying was that while I knew exactly what spring/cam combination to use for jet flying, the damping force is purely by feel and how much you turn the bolt. Perhaps in future versions there could be some sort of clickable rotating knob to either count the clicks or have some visual way of displaying how much force is being applied so that it can be referenced again.

Conclusion

The WINWING Orion 2 joystick base is a robust and easy to setup solution for flight simulation. Its easily adjustable setup makes it a solid performer that’s perhaps let down slightly by the lack of included CAMS/Springs and damping to allow a new owner a truly customizable and fit-for-purpose solution right out of the box with the base product.

Shortcomings aside, purchasing the added Cam/Spring/Damping extension kid adds over 50 possible combinations and allows this base to be completely configured for whatever is bolted onto it. Further options are available such as extension rods, Z-Axis modules or even the Orion 2 MFSSB Kit rounding out a great base to enhance your combat flight experience.

Great base but perhaps include some more customization for the price?

7/10


Pros

  • Simple to configure and adjust
  • Easy to access the internals, completed with the removal of 4 bolts located on the top of the unit
  • Simple but effective locking mechanism for the stick
  • Smooth movement through both X and Y axis
  • Ability to add Z-Axis twist through addon (purchased separately)
  • Highly configurable with Extension kit (purchased separately)

Cons

  • With the 16EX Metal Joystick Grip with Shaker Kit, the base cams/springs are just too soft and the slackness in the stick and oscillation isn’t great.
  • The base is competitively priced however charging almost $85 AUD ($57 USD) for the extension kit is quite the ask. I strongly believe that this extension kit should be included as part of the base product.